4. Next Steps
After the installation you can test the service using one of the Thunderstorm collectors or the Python API client.
4.1. Configuration
The installation script for Linux system installs a service that passes
the parameter -t /etc/thunderstorm/thunderstorm.yml to initialize
the default config stored at that location.
The default configuration file on Linux looks like this:
# License path
license-path: /etc/thunderstorm
# Write all outputs to the following directory
logfile: /var/log/thunderstorm/thunderstorm.log
appendlog: True
# Listen on all possible network interfaces
server-host: 0.0.0.0
server-port: 8080
# Pure YARA scanning
pure-yara: False
# SSL/TLS
# SSL/TLS Server Certificate
#server-cert: /path/to/file
# SSL/TLS Server Certificate Private Key
#server-key: /path/to/file
# File Submissions
# Directory to which the samples get stored in asynchronous mode
server-upload-dir: /tmp/thunderstorm
# Permanently store the submitted samples (valied values: none/all/malicious)
server-store-samples: none
# Tuning
# Server Result Cache
# This is the number of cached results from asynchronous submission
# available for remote queries (default: 10000)
#server-result-cache-size: 10000
You can use all of THOR's flags in that configuration. Be advised that you always have to use their long form.
This page lists all of THOR command line flags:
https://github.com/NextronSystems/nextron-helper-scripts/tree/master/thor-help
The following chapters list some of the most useful command line flags when using THOR Thunderstorm.
4.1.1. Forward Logs to SIEM or Analysis Cockpit
syslog: mysiem.local
Config entry to forward logs to a SIEM
We recommend reading chapter
Syslog or TCP/UDP Output <https://thor-manual.nextron-systems.com/en/latest/usage/output-options.html#syslog-or-tcp-udp-output>
in the THOR User Manual for details on the SYSLOG forwarding flags.
You can find it in the folder /opt/nextron/thunderstorm/docs
after a successful Thunderstorm installation on Linux or in the
"Downloads" section in the customer portal.
4.1.1.1. Keep Samples on the Thunderstorm Server
Keep samples with findings
server-store-samples: malicious
Keep all samples
server-store-samples: all
4.2. Custom Signatures
Since most of the functionalities of THOR are included in Thunderstorm, you can also include your own custom signatures. The process is identical to that of a normal THOR installation. Please see the Custom Signatures chapter in the THOR Manual.
Note
Don't forget to Restart the Service after placing your custom signatures in the dedicated directory.
4.3. Log Output
The scan results and startup messages can be found in:
user@unix:~$ sudo less /var/log/thunderstorm/thunderstorm.log
You could open another command line window and monitor new messages with:
user@unix:~$ sudo tail -f /var/log/thunderstorm/thunderstorm.log
4.4. Thunderstorm API Documentation
An API documentation is integrated into the web service.
Simply visit the service URL, e.g.: http://my-server:8080/
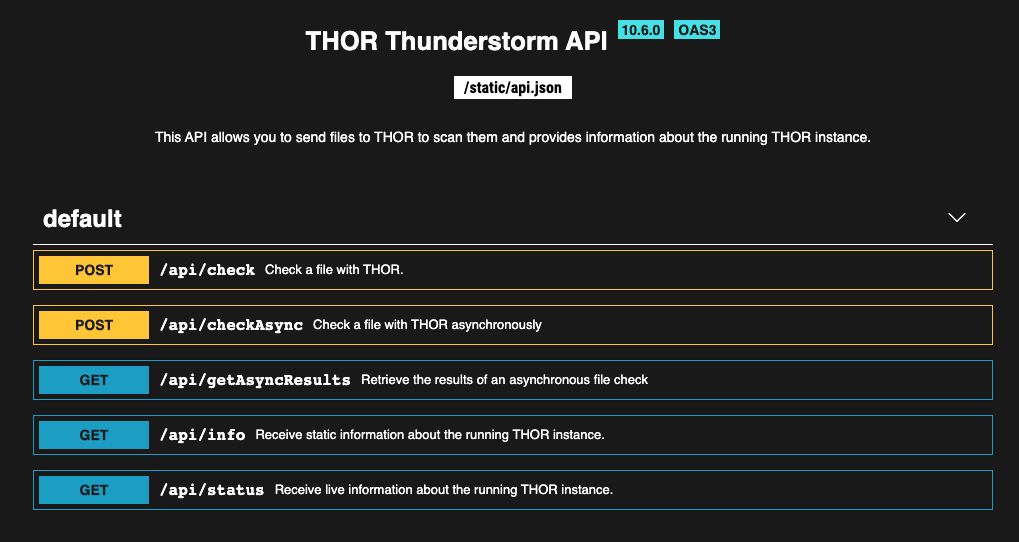
Thunderstorm API Documentation
4.5. Test Submission
To test the Thunderstorm service, you can create a tiny webshell sample and submit it to the service using the following commands.
#!/bin/bash
echo "<%eval request(" > test.txt
curl -X POST "http://my-server:8080/api/check?pretty=true" -F "file=@test.txt"
This should produce the following output in the current command line.
[
   {
      "level": "Alert",
      "module": "Filescan",
      "message": "Malware file found",
      "score": 350,
      "context": {
         "ext": ".txt",
         "file": "test.txt",
         "firstBytes": "3c256576616c2072657175657374280a / \\u003c%eval request(\\n",
         "md5": "2481bc6bb2d063522ef8b5d579fd97d7",
         "sha1": "4d40de75d7c8591d2ea59d3a000fb6cf58d97896",
         "sha256": "3b435df5076f6b1df7f2bc97cd86fbf7b479352e8c33960dfc4f1cbbe9b14fa7",
         "size": 16,
         "type": "JSP"
      }
   }
]
Output of test sample submission
Be aware that this has been a "synchronous" submission to the API endpoint "check". The collection of high amounts of samples in collector scripts and tools uses the endpoint "checkAsync", which doesn't return a result to the submitting source.
4.5.1. Test Submission Using the API Documentation
The web GUI running on Port 8080 contains an interactive API documentation, which you can use to submit a first test sample.
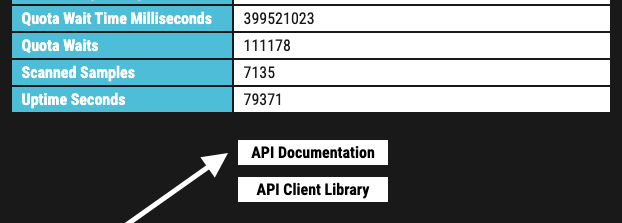
Link to API Documentation on Start Page
Select the API function /api/check, then click "Try it out" and then
select and submit a sample using the enabled form.
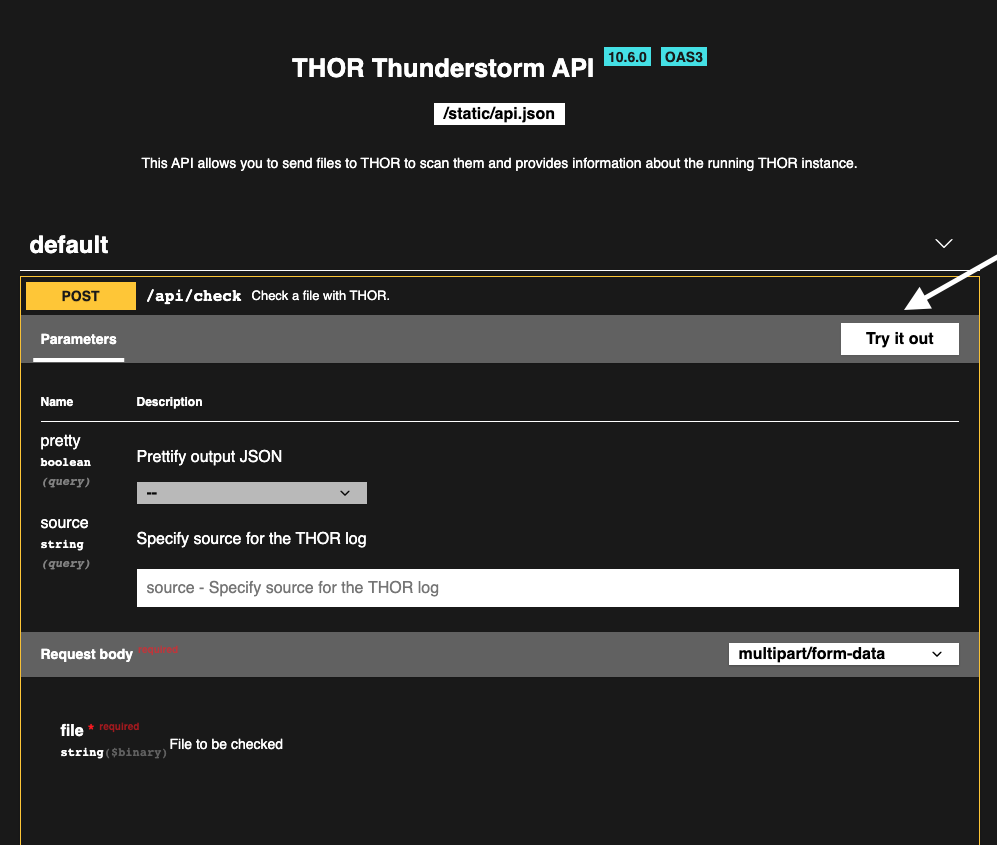
Test Sample Submission via API Documentation
The result appears in a separate text field. Use the "pretty" flag to get a prettified JSON response.
4.6. Thunderstorm Collectors
You can find a Thunderstorm collector for numerous different operating systems and architecture in our Github repository. We recommend using the collectors written in Go.
https://github.com/NextronSystems/thunderstorm-collector
You find pre-compiled collector binaries in the release section of the repository.
See the README on Github for more information.
4.6.1. Run the Collectors
We highly recommend using the config.yml as a configuration during the collection. It limits the samples the collector selects for a submission to relevant file types and sizes. Otherwise the collector would transmit every possible file, which is usually not recommended.
You would then start a collector run using the following command line:
Windows (64 bit):
C:\nextron\thunderstorm>amd64-windows-thunderstorm-collector.exe -t config.yml
Linux (64 bit):
user@unix:~$ ./amd64-linux-thunderstorm-collector -t config.yml
(Replace the collector binary name with the one you plan to use)
4.6.2. Performance Considerations for the Collection
In a THOR Thunderstorm setup, the system load moves from the end systems to the Thunderstorm server.
In cases in which you don't use the default configuration file provided
with the collectors (config.yml) and collect all files from an end
system, the Thunderstorm server requires a much higher amount of time to
process the samples.
E.g. A Thunderstorm server with 40 CPU Cores (40 threads) needs 1 hour to process all 400,000 files sent from a Windows 10 end system. Sending all files from 200 Windows 10 end systems to a Thunderstorm server with that specs would take up to 10 days to process all the samples.
As a rule of thumb, when using the hardware recommended in
Hardware Requirements, calculate
with a processing speed of 250 samples per core per minute.
We highly recommend using the default configuration file named
config.yml provided with the collectors. See the README on Github
for more information.
4.7. Thunderstorm API Client
We provide a free and open source command line client written in Python to communicate with the Thunderstorm service.
https://github.com/NextronSystems/thunderstormAPI
It can be installed with:
user@unix:~$ pip install thunderstormAPI
4.8. Source Identification
The log file generated by THOR Thunderstorm doesn't contain the current host as hostname in each line. By default, it contains the sending source's FQDN or IP address if a name cannot be resolved using the locally configured DNS server.
However, every source can set a "source" value in the request and overwrite the automatically evaluated hostname. This way users can use custom values that are evaluated or set on the sending on the end system.
user@unix:~$ curl -X POST "http://myserver:8080/api/check?source=test" -F "file=@sample.exe"
4.9. Synchronous and Asynchronous Mode
It is also important to mention that THOR Thunderstorm supports two ways to submit samples, a synchronous and an asynchronous mode.
The default is synchronous submission. In this mode, the sender waits for the scan result, which can be empty in case of no detection or contains match elements in cases in which a threat could be identified.
In asynchronous mode, the submitter doesn't wait for the scan result but always gets a send receipt with an id, which can just be discarded or used to query the service at a later point in time. This mode is best for use cases in which the submitter doesn't need to know the scan results and batch submission should be as fast as possible.
Synchronous |
Asynchronous |
|
|---|---|---|
Server API Endpoint |
/api/check |
/api/checkAsync |
ThunderstormAPI Client Parameter |
--asyn |
|
Advantage |
Returns Scan Result |
Faster Submission |
Disadvantage |
Client waits for result of each sample |
No immediate scan result on the client side |
In asynchronous mode, the Thunderstorm service keeps the samples in a
queue on disk and processes them one by one as soon as a thread has time
to scan them. The number of files in this queue can be queried at the
status endpoint /api/status and checked on the landing page of the
web GUI.
In environments in which the Thunderstorm service is used to handle synchronous and asynchronous requests at the same time, it is possible that all threads are busy processing cached asynchronous samples and not more synchronous requests are possible.
In this case use the --sync-only-threads flag to reserve a number of
threads for synchronous requests. (e.g. --threads 40 --sync-only-threads 10)
4.10. Performance Tests
Performance tests showed the differences between the two submission modes.
In Synchronous mode, sample transmission and server processing take exactly the same time since the client always waits for the scan result. In asynchronous mode, the sample transmission takes much less time, but the processing on the server takes a bit longer, since the sever caches the samples on disk.
Synchronous |
Asynchronous |
|
|---|---|---|
Client Transmission |
40 minutes |
18 minutes |
Server Processing |
46 minutes |
|
Total Time |
40 minutes |
46 minutes |
4.11. SSL/TLS
We do not recommend the use of SSL/TLS since it impacts the submission performance. In cases in which you transfer files through networks with IDS/IPS appliances, the submission in an SSL/TLS protected tunnel prevents IDS alerts and connection resets by the IPS.
Depending on the average size of the samples, the submission frequency and the number of different sources that submit samples, the transmission could take up to twice as much time.
Note
The thunderstormAPI client doesn't verify the server's certificate
by default as in this special case, secrecy isn't important. The main
goal of the SSL/TLS encryption is an obscured method to transport
potentially malicious samples over network segments that could be
monitored by IDS/IPS systems. You can activate certificate checks with
the --verify command line flag or verify parameter in API
library's method respectively.